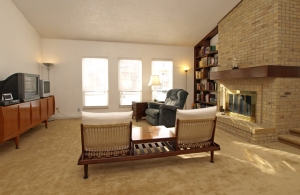
Preparing a home for a photo shoot

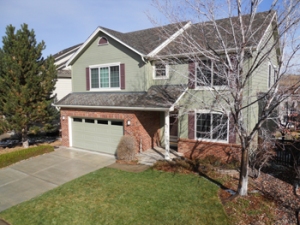
In the 7 years I have been photographing homes for sale, I have moved many trash cans, tissue boxes and numerous other items. So, with the suggestion of another photographer across the country, I put together a handout to send to home owners. Once a homeowner has this in hand, the house is usually in photo ready shape for me when I arrive.

Feel free to use my suggestions to create your own handout.

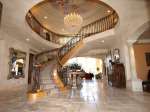
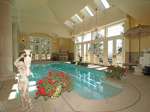
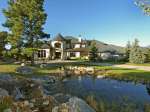
Virtual Tour of an 11,000+ Square Foot Home

Wow, this home was so much fun and a challenge to photograph in the late summer of 2010. I did have to go back the next morning to capture the sun on the front of the home and it was well worth it for the result.

Click on any of the photos to see the tour.

A Tool for Enhancing the Pole Pixie for Your Point & Shoot – The Pixie Click

If you are using a point and shoot camera on your Pole Pixie and want a great way to click off a number of pictures easily. It’s time to check out the Pixie Click http://polepixie.com/pixie-click-remote-trigger.cfm

As you may or may not know there are currently no remote radio triggers for point and shoot cameras. So, to use the Pole Pixie one has to set the timer on the camera, click the shutter release and raise the pole up and shot. Each time bringing the camera back down and setting it up again. The advantage of the Pixie Click is that allows you to shoot a whole raft of photos shifting the camera around without bringing the pole down each time. And out of all of those photos usually one will work best for your job.

Though the Pixie Click is not designed for a DSLR, I was initially hoping that I could use this new product with my DSLR, but neither of my cameras fit. And after using this device with a point and shot camera I realized the whole system would be too heavy with a DSLR camera. And it would be especially heavy with a wide angle lens attached.

So, I tried the Pixie Click with my point and shoot Nikon camera. It did take a while to set up the camera within the Pixie Click frame – which the instructions say it will. But, once I got it all set up I had a great time trying it out. The instructions are clear to understand with photos illustrating the setup. It also is definitely easier to set up the second time since all of my settings remained in place and all I had to do was attach the camera and I was ready to go.

Once I was all set up, I had a good time testing it out. Here I shot from the middle of the street. One is an example of a missed shot the other a good shot. During this round I shot about 10 photos in the matter of a minute.

I then decided I needed to go in closer to see how the house would look and again I took around 10 shots in the matter of a minute. Here are two of my results, one not so good and one good.

Then I just tried photographing down the street and this was the result.

So, if you are using your point and shoot camera for some of your exterior shots and already either have or are looking at purchasing the Pole Pixie, I recommend the additional investment in the Pixie Click to give you a full system for shooting those high shots.

Photo Tip on Choosing a Camera for Real Estate Photography

I discovered a good blog for Real Estate photography that has been around a lot longer than I.

I am not a real techie when it comes to cameras. My Digital SLR Olympus cameras work for me. I can’t, off the top of my head tell you what lenses I use. I am visual and have to look through the lens to know if it is going to work for what I am trying to accomplish. So, if you are in need of a new camera to use for real estate photography, I suggest you go to this page: http://photographyforrealestate.net/cameras/. They also have suggestions for smaller, less expensive cameras and suggested lenses.

Photo Tip – How to Straighten Walls in Photoshop Elements

Have you ever ended up with an oddly angled wall in a photograph of a room?   If you are using a wide angle lens, this seems to happen more often. Sometimes if you are looking from a high angle down on a room – I do this a lot in kitchens to show off appliances –  it works well to leave the odd angles.

It is obvious in this picture that I am looking down on the room to show off the appliances and tops of the counters.

When you are really looking more directly at  room and the walls are slanted like the second photo, it is better to try and correct the angle.
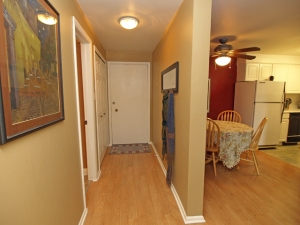
With a few simple steps you can make the walls in a photo straighter.

Step by Step instructions:

While your photo is open and in the workspace of Photoshop Elements go to the top menu bar and click on “Image” > “Transform” > “Skew”

You might get a message asking if you wish to create a new layer. If so, select “Yes”

Now make sure that your image is small enough to see all of the corners of your image with additional space around all four sides. You can do this easily on your PC by clicking “Ctrl -” (the minus symbol) on your Mac it’s “Command -” (also the minus symbol).

Place your cursor on the corner you wish to move out – hold down the left mouse button and drag the corner out until your wall is mostly straight. Go to the opposite corner and drag that corner out to straighten the other side.

This image shows how far I dragged out the corners to straighten the walls in this particular image.

Once you are pleased with the results click on the Check Mark. Next you want to go to “Layer” > “Flatten Image” . The reason for this is make the file itself smaller and easier to save as a jpeg file.

Let me know if you have any comments or questions.

Using Visual Tour® to Create Virtual Tours – Made for REALTORS®

As a photographer I have been using Visual Tour® to create virtual tours for my clients. This program was developed for REALTORS® who do their own photography. It is easy to use and the results can be quite wonderful.

You can have as many as 50 images within the tour. You can do a combination of still shots and panoramics – all of which can move, if you so chose.

Visual Tour® requires that you use a digital camera. It’s best if you shoot with the highest resolution possible. When I started my business 5 years ago, I just had a high quality point and shoot camera. I have since moved up to an Olympus SLR (single lens reflex) which allows me to shot very high quality images. As I have moved up with the quality of my equipment Visual Tour® has been upgrading their viewers and I think it’s one of the best interfaces for viewing tours on the web.

I generally do panoramic shots that are more of a 180° shot instead of the 360° shots that many of the tour companies do because I find that the room is not as visually distorted when viewing. In doing those pan shots I have trained myself to shot with the camera vertically by hand instead of horizontally on a tripod. I always shot each panoramic twice, just in case some of the walls, counters, etc. don’t quite line up when the images are stitched together.

Here is a recent tour for you to check out:

I will plan on talking about some tips and tricks I have learned doing virtual tours using Visual Tour® in this blog in the future. If you have particular questions or comments. Please comment above.

Photo Tip – Sizing for Denver Area Metrolist – Correction

So, I have found out that the true size one should use when resizing pictures to the Denver Area Metrolist is 640 pixels wide x 480 pixels high. It might not look 100% correct on www.recolorado.com, but it will on all other sites.

It sure makes life easier, in that you can just resize your photo to 640 pixels wide and the height does not have to be cropped – as I had previously stated in a blog post last August.

Photo Tip – What a difference changing the carpet makes.

I think it is a great idea that once a homeowner has made changes after the home has been photographed and listed that you go back to take pictures of those changes. It’s also a good idea to refresh the listing after changing out the pictures.

I just reshot a house this week. What a difference the new brown carpet makes on this home.


Continue reading

Photo Tip – Grey Skies Behind the Home? Make them Blue.

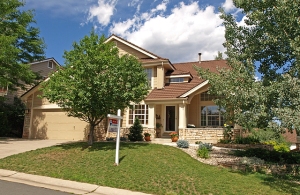
Have you ever been photographing a home and the clouds are right behind the home and there is no spot of blue in the picture? It can be so frustrating especially if it is a great day and there is blue in the sky around and the sun is shining on the house.

front with grey sky  Front with added blue sky

I have a solution – though it takes longer than the quick fix in Photoshop Elements 7.0 – which I am not convinced  works very well, at least for my purpose. I have tried the quick fix for skies, but have found two problems. 1. The blue that is inserts is a weird blue, especially for Colorado skies. 2. If there is no grey or color in the clouds it doesn’t add any color.

The process, I recommend, can take a little while in Photoshop especially if there is a tree or other vegetation that is above the roof line of the home. I think it is well worth the time to get it looking right.

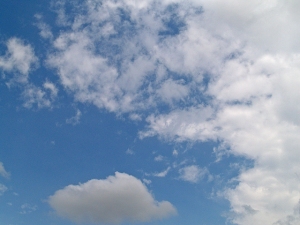
sky shot    First, take a few pictures of the blue sky around the area that day. Make sure to include clouds  – it will be more convincing when incorporated into the picture of the home.
 

Continue reading

Photo Tip – Sizing Photos for the Denver Area Metrolist

I have tried to keep up with this blog, but the last few weeks have been packed with jobs. I am not complaining at all, it’s been great!

Periodically, I call Metrolist to find out if I am sizing the photos properly – It had been 448 pixels x 290 pixels. This time I was told 640 pixels x 480 pixels – which I was pretty sure was  not the same proportions as what I had been using. So, I did a test. I uploaded a photo that was 64ox480 and then proceeded to look at it on the mls. It was distorted – the photo had been stretched to the elogated rectangle on the site.

I went back to the drawing board…and thought if the old proportions still worked, but we could upload a larger photo – I would try that. In order to figure the proportions using 640 as my width. I went to google and found http://www.scriptygoddess.com/resources/proportioncalc.htm   –  I could type in the old proportions and one new proportion and it would give me the other side. Turns out it is 640×415 pixels.

I tried the new size and presto, it worked.

797510a  mls Front

My goal is to make sure we see the best photos out there for real estate. If Realtors® and their assistants don’t know the correct proportions, their photos are never going to look right to the public. So, what do we do?